DTF Printing Banding: How to Fix Lines and Uneven Color
Look at the photo. If you print DTF, you will probably recognize those bands and patches immediately. Blues, cyans and pinks make them especially obvious: you wanted a smooth solid color and got a zebra instead.
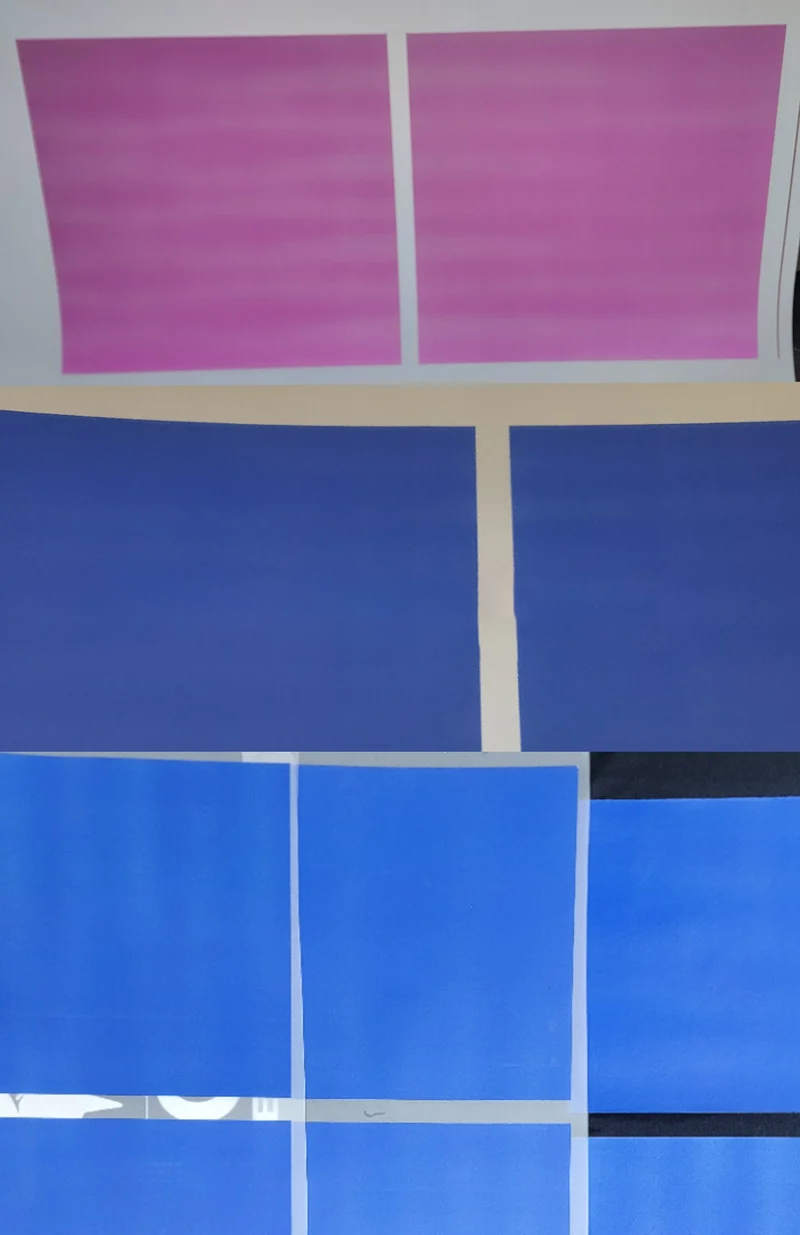
Everyone has a theory: ink starvation, dampers, bad ink, humidity. We might as well check the weather on Mars next. I would rather look at where the drops actually land.
Here I want to show you one cause that often gets overlooked: a slightly rotated printhead. It looks straight to the eye, yet solid fills come out with lines and patchy color.
How a tiny head rotation turns into banding
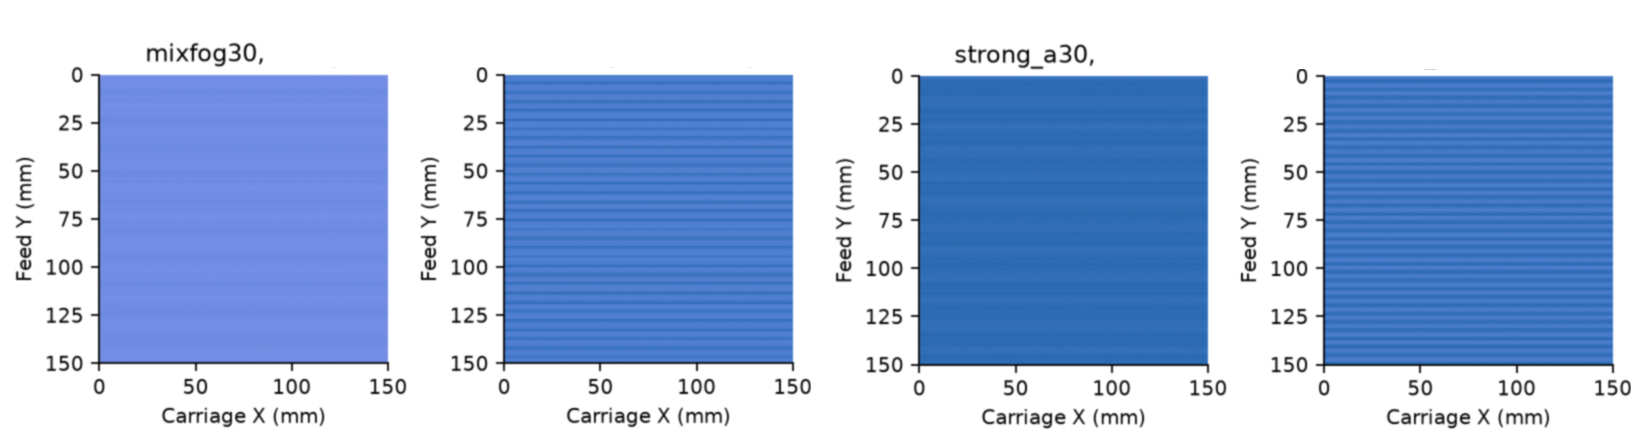
I use digital simulations to investigate this: change the head angle, look at the drop placement, then compare different pass-blending settings. This blending, often called Enclosure, controls the overlap and smoothing between passes.
Rotate the head a little and the drops no longer land exactly where they should. Some areas get more drops, others get fewer. Those small differences build up into a familiar pattern: light bands, dark bands and uneven patches.
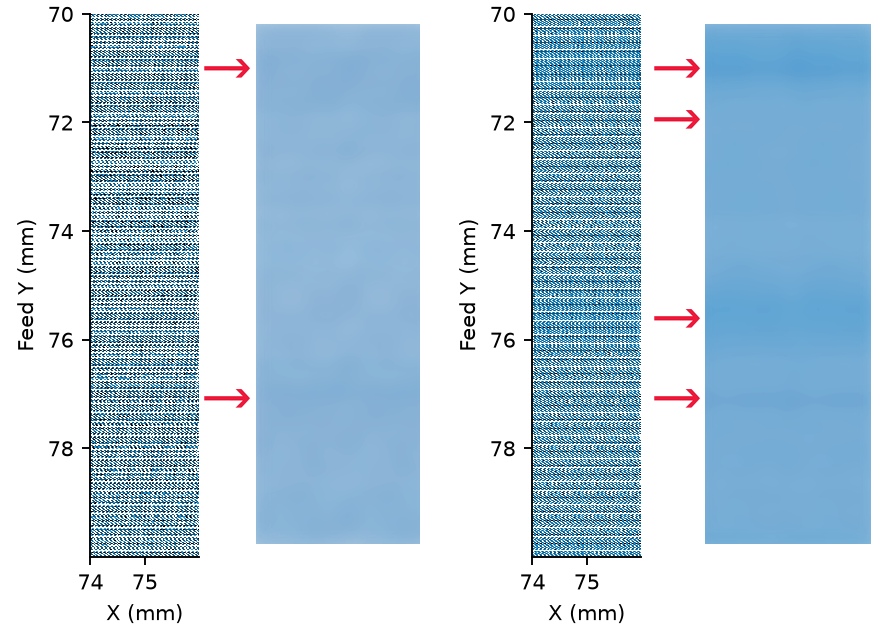
The close-up makes it easier to see: uneven dot placement becomes uneven color. Heavy pass blending can smooth out the pattern, but you pay for it in printing speed.
How to check printhead rotation in NXRIP
Open Direct Print → Calibrations and select “Head parallelism.” Choose the head you want to adjust and print the test.
It looks boring: just lines of dots. But those lines reveal what you cannot set accurately by eye. The test uses the outermost nozzles; in the overlapping sections, compare how closely the lines and individual dots match.
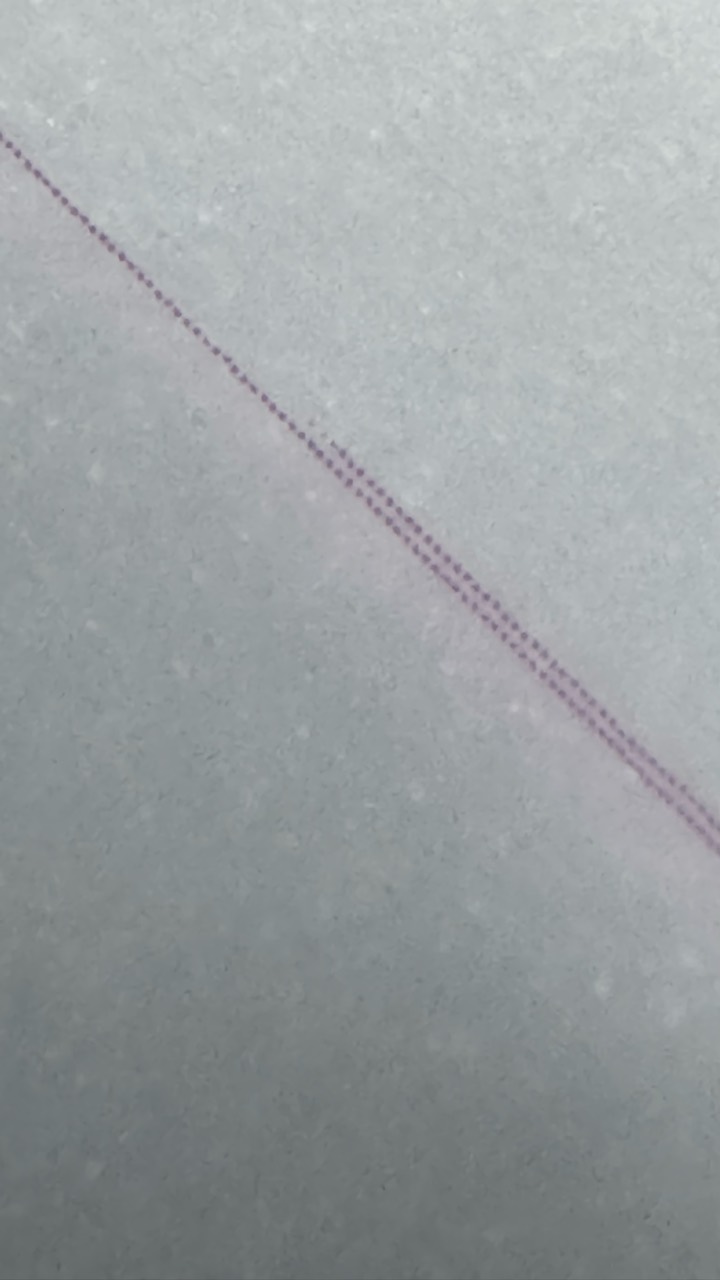
The goal is an exact match, nozzle for nozzle. Not “close enough” or “probably fine.” If the lines separate, adjust the head rotation until it is properly aligned with the carriage travel axis.
The Test button: stay at the printer
While NXRIP’s calibration window is open, the Test button on the printer panel runs the test selected in that window. Select head parallelism and it prints the alignment test. Select step calibration and it prints the film-feed test. No need to keep walking back to the computer.
Press Test, wait for printing to finish and look through the microscope. With the printer stopped, make a small head adjustment, advance the film to a fresh area and press Test again. Inspect, adjust, repeat.
Once the dots line up, secure the head and print one more test. Tightening the mounting screws can shift it slightly, so check it straight away. A microscope, a screwdriver and a few repeats beat running back and forth.
Now reduce pass blending and get your speed back
Now you can start lowering the blending amount. In NXRIP, I recommend starting with MixFog. After precise alignment, try reducing your usual percentage to roughly a half or a third, checking solid fills as you go.
With less pass blending, printing can become roughly 1.5 times as fast. That is the point: align the head accurately first, then print faster, rather than covering up a crooked head with more overlap.
I am also working on a more refined blending mode. I will cover that separately. For now: MixFog, accurate calibration and a check on your own print.
What about film-feed step calibration?
Head rotation and film-feed step are two different adjustments. Even a perfectly aligned head needs accurate feeding. I have already written about step calibration and will return to it in more detail.
Previous post: getting the film-feed step right
For now, start with head rotation. Those “mysterious patches” can make a lot more sense when you look at two lines through a microscope. You are welcome.